
Understanding Finger Anatomy and Biomechanical Strain
Mastering effective finger taping techniques protects your joints by providing external structural stability, dampening peak shock loads, and preventing dangerous lateral deviation or hyperextension. Core methods include buddy taping to distribute mechanical loads to an adjacent digit, H-taping to reduce flexor tendon bowstringing across injured pulleys, and X-taping to reinforce the joint capsule during active movement.
To understand why these taping strategies work, we have to look at what happens under the skin. Each of your four fingers consists of three small bones called phalanges (the proximal, middle, and distal phalanx), connected by three primary joints: the metacarpophalangeal (MCP) knuckle joint, the proximal interphalangeal (PIP) joint, and the distal interphalangeal (DIP) joint. The thumb operates with just two phalanges and two primary hinge points.

Stabilizing these hinges are pairs of tough fibrous bands known as collateral ligaments, which sit on the lateral and medial sides of each joint to stop fingers from bending sideways. On the palm side, thick fibrocartilaginous plates (volar plates) prevent painful hyperextension. When you reach for an aggressive block on the court or grip a heavy barbell, these delicate connective tissues take the brunt of the impact. Applying athletic tape for injuries provides an external scaffold that shields these vulnerable ligaments while tissues heal.
Annular Pulleys and Joint Architecture
Your fingers do not contain muscles; they are powered remotely by forearm muscles via long flexor tendons—the flexor digitorum superficialis (FDS) and flexor digitorum profundus (FDP). These tendons glide through a specialized synovial flexor sheath and are anchored tightly against the bone by a series of five annular pulleys (A1 through A5) and three cruciform pulleys (C1 through C3).
The A2 pulley (located on the proximal phalanx) and the A4 pulley (on the middle phalanx) are the structural anchors of this system. When you execute a closed crimp grip on a climbing hold or crimp down hard on an opponent's gi, these pulleys experience intense radial pressure. If a pulley stretches or tears, the flexor tendon pulls away from the bone—a painful mechanical failure known as "bowstringing."
Mechanical Loading and Rupture Thresholds
The forces placed on human fingers during athletic movement are staggering. Biomechanical research reveals that the force experienced at the A2 pulley can be three to four times greater than the force applied at the fingertip. For recreational climbers, baseline pulley loads routinely reach 380 Newtons (N), and dynamic slips or sudden foot blowouts cause force spikes of 450N or higher.
Given that the average rupture strength of a healthy human A2 pulley is around 400N, it becomes obvious why dynamic slips often result in severe sprains or tears. Taping reduces the mechanical strain on these tissues by reinforcing structural alignment and dampening peak shock loads.
Essential Finger Taping Techniques for Joint Protection
Choosing the correct application method makes the difference between stable, pain-free performance and restrictive, uncomfortable bulk. Applying specialized finger tape provides localized joint immobilization and therapeutic support during movement.
Buddy Taping for Ligament Strains and Fractures
Buddy taping is a time-tested technique that uses an adjacent uninjured digit as a natural anatomical splint. By binding the injured finger to its healthy neighbor, you eliminate lateral twisting and share physical loading across two digits while preserving healthy flexion and extension.
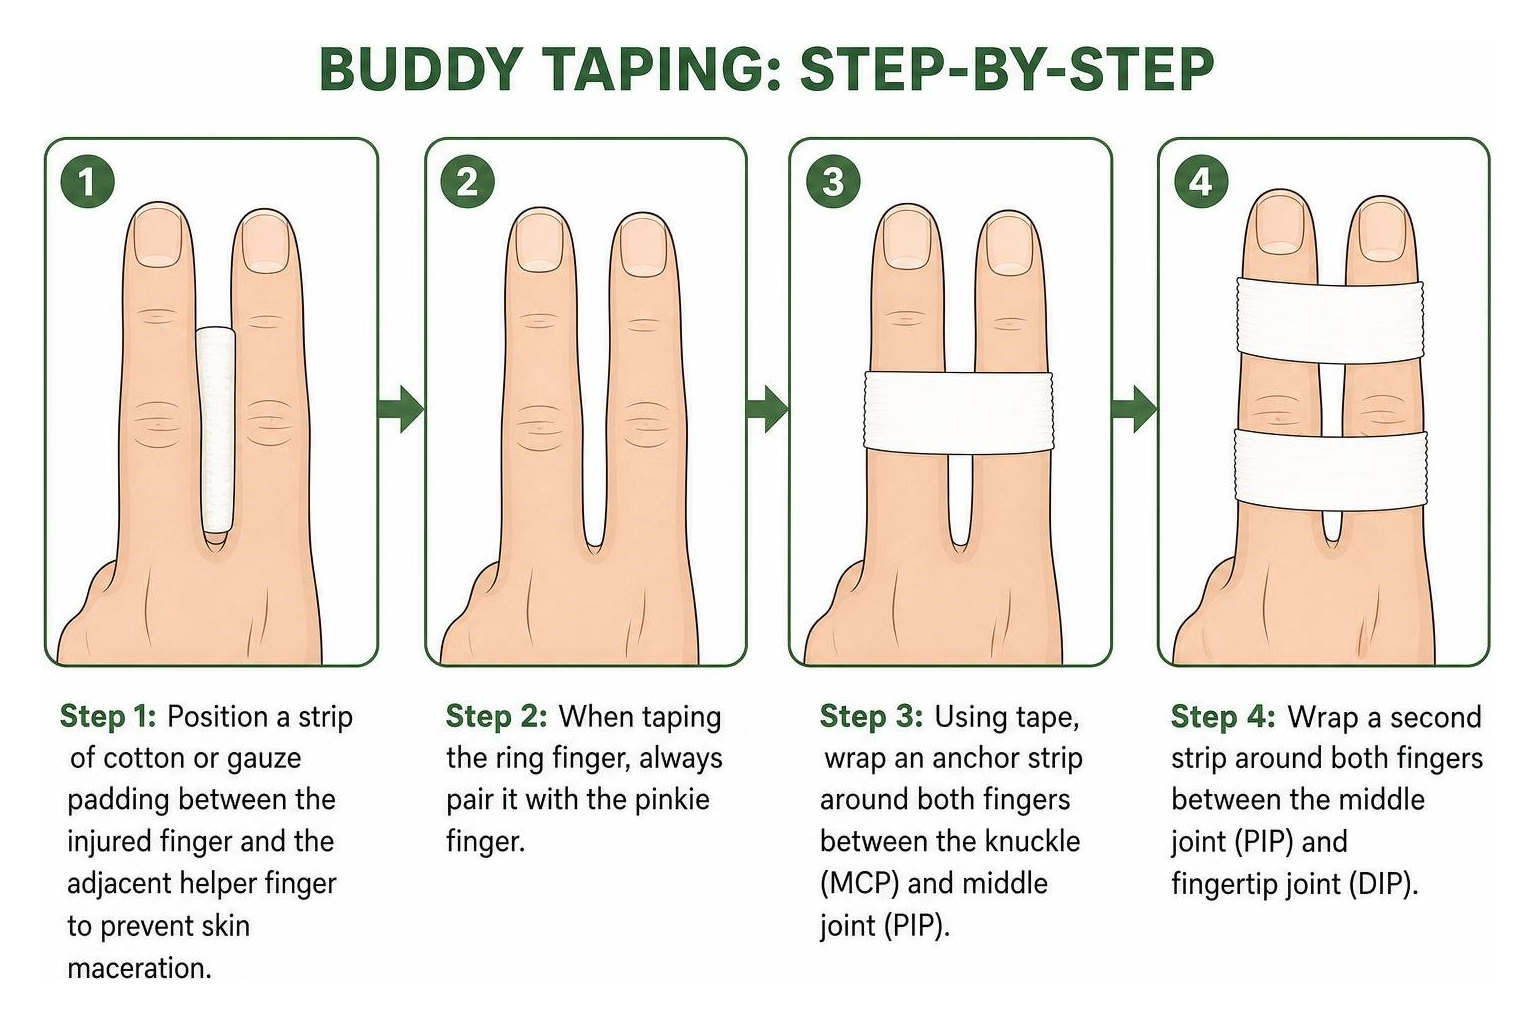
- When to use: Stable collateral ligament sprains, jammed PIP joints, and non-displaced finger fractures during recovery. Clinical studies note that buddy taping is as effective as splinting for paediatric finger fractures, with immobilization typically lasting two to four weeks.
- Step 1: Position a strip of cotton or gauze padding between the injured finger and the adjacent helper finger to prevent skin maceration.
- Step 2: When taping the ring finger, always pair it with the pinkie finger (pairing the ring with the middle finger severely limits hand closure and functional grip).
- Step 3: Using Shield Precision Tape 24pk, wrap an anchor strip around both fingers between the knuckle (MCP) and middle joint (PIP).
- Step 4: Wrap a second strip around both fingers between the middle joint (PIP) and fingertip joint (DIP).
- Crucial Rule: Keep all joint creases uncovered so the fingers can bend freely without friction. Refer to clinical guidelines on buddy-taping fingers to ensure proper positioning and avoid circulatory restriction.
H-Taping and Circumferential Pulley Offloading
For flexor pulley rehabilitation, standard circular wraps do not offer enough mechanical leverage. H-taping creates an external bridge that physically presses the tendon back toward the bone.
- When to use: Post-acute rehabilitation of A2 or A4 pulley sprains during climbing or grip training. Physical therapy research on pulley taping demonstrates that H-taping decreased the tendon-bone distance by 16% and increased crimp strength by 13% in injured fingers.
- Step 1: Cut a 10 cm long by 1.5 cm wide strip of non-stretch rigid strapping tape.
- Step 2: Cut down the center lengthwise from both ends, leaving an uncut 1 cm solid bridge in the middle.
- Step 3: Place the uncut center bridge directly over the palmar aspect of the injured pulley while bending your finger into a functional 30-degree crimp grip.
- Step 4: Wrap the two lower arms smoothly around the phalanx below the joint, and wrap the two upper arms around the phalanx above the joint, overlapping the ends on the back of your finger.
X-Taping and Figure-Eight Support
X-taping (also known as figure-eight taping) provides multi-directional support for the PIP joint without creating a bulky wrap that locks the hand open.
- When to use: Jammed knuckles, volar plate strains, and joint capsulitis in ball sports or combat training.
- Step 1: Anchor a narrow 0.5-inch strip of rigid tape on the palmar side of the proximal phalanx (just below the PIP joint).
- Step 2: Cross the tape diagonally over the lateral joint line, pass across the back of the middle phalanx, and loop around the bone.
- Step 3: Bring the tape diagonally back down across the opposite joint line in an 'X' pattern, finishing on the original anchor.
- Step 4: This criss-cross structure limits sideways collapse and hyperextension while allowing complete joint closure.
Material Selection and Application Rules for Safe Strapping
Using the wrong tape creates a false sense of security. Selecting athletic tape for hands requires matching the material's elasticity and tensile strength to your specific injury.
Rigid Zinc Oxide vs Elastic Kinesiology Tape
Rigid non-stretch tapes lock out unwanted movement and offer mechanical support. Elastic tapes provide dynamic tension and proprioceptive feedback.
| Feature | Rigid Zinc Oxide Tape | Elastic Kinesiology Tape | Cohesive Bandage Wrap |
|---|---|---|---|
| Primary Material | High-tensile bleached cotton or rayon | Elastic cotton/synthetic blend | Self-adherent porous fibers |
| Stretch Capacity | 0% (Non-elastic rigidity) | 30% – 40% Dynamic stretch | Moderate elastic compression |
| Best Used For | Pulley offloading, buddy taping, joint locking | Edema reduction, proprioception, minor sprains | Swelling control, light skin barrier |
| Adhesive Style | Zinc-oxide medical adhesive | Heat-activated acrylic | Non-adhesive (sticks to itself) |
| Ideal Width | 0.5 in (1.25 cm) to 1.0 in (2.5 cm) | 1.0 in (cut from standard 2 in rolls) | 1.0 in to 2.0 in |
For structural joint support, heavy-duty options like Shield 1 Inch Athletic Tape Precision Tape 12 Pack or ultra-durable Shield Rayon Finger Tape provide non-stretch hold that will not buckle under high torque. While kinesiology and circumferential taping reduce strain on the A2 pulley by an average of 13–18%, elastic tapes cannot mechanically replace ruptured ligaments.
Skin Preparation and Tension Management
To ensure tape stays locked in place through sweat, chalk, and friction, follow these preparation steps:
- Clean and Degrease: Wash hands thoroughly with soap and water or swipe digits with an alcohol wipe to remove natural oils, sweat, and chalk.
- Manage Hair: If taping hairy digits, trim excess hair with scissors 12 hours prior rather than shaving immediately before application, which avoids micro-abrasions.
- Use Underwrap for Sensitive Skin: If you have sensitive skin, apply a porous hypoallergenic underwrap to protect the epidermis from adhesive contact.
- Zero-Tension Anchors: Never stretch the beginning or ending 1 cm of a tape strip. Laying the ends down flat without tension prevents premature peeling and skin blisters.
- Thermal Activation: Rub the applied tape firmly for 15 seconds; the friction heat cures the zinc-oxide adhesive to maximize grip.
Sport-Specific Protocols for High-Impact Athletes

Different sports place unique physical demands on your hands. Tailoring your application ensures your joints stay secure without compromising performance.
Adapting Finger Taping Techniques for Volleyball and Ball Sports
Court sports like volleyball, basketball, and football expose fingers to sudden, high-velocity axial impacts. When setting, blocking at the net, or catching passes, stray balls can force finger joints into extreme hyperextension or lateral deviation. Using athletic tape for football players or court athletes helps prevent common "jammed" knuckles by reinforcing the joint capsule.
For outside hitters and middle blockers, buddy taping the ring and pinkie fingers provides a broad, stable surface to absorb ball impacts without sacrificing hand control. If you need single-joint articulation for precision setting, apply an X-tape configuration over the PIP joint to block hyperextension while keeping your touch clean.
Mastering Finger Taping Techniques for Weightlifting and Climbing
In strength sports and climbing, finger strapping serves a dual purpose: joint protection and skin defense. When working with barbells, utilizing Shield Combat Tape Boxing Tape for Hands or athletic tape for MMA shields knuckle calluses against rough knurling during heavy deadlifts, cleans, and snatches. For Olympic lifters utilizing the hook grip, wrapping the thumb with a flexible, high-friction wrap prevents bar slip while protecting the thumb joint.
Climbers dealing with friction splits or torn calluses ("flappers") should apply a protective cap wrap:
- Lay a vertical strip directly over the fingertip from the nail bed to the distal crease.
- Lock it down with a tight spiral wrap starting at the DIP joint and working downward.
- Finish with an overlapping figure-eight wrap at the joint line to secure the edges against rock abrasions.
For comprehensive management of climbing-related strains, review our dedicated guide on climbing finger injury prevention.
Clinical Contraindications, Common Errors, and Aftercare
While strapping is an exceptional athletic tool, using it improperly can mask serious injuries or cause tissue damage.
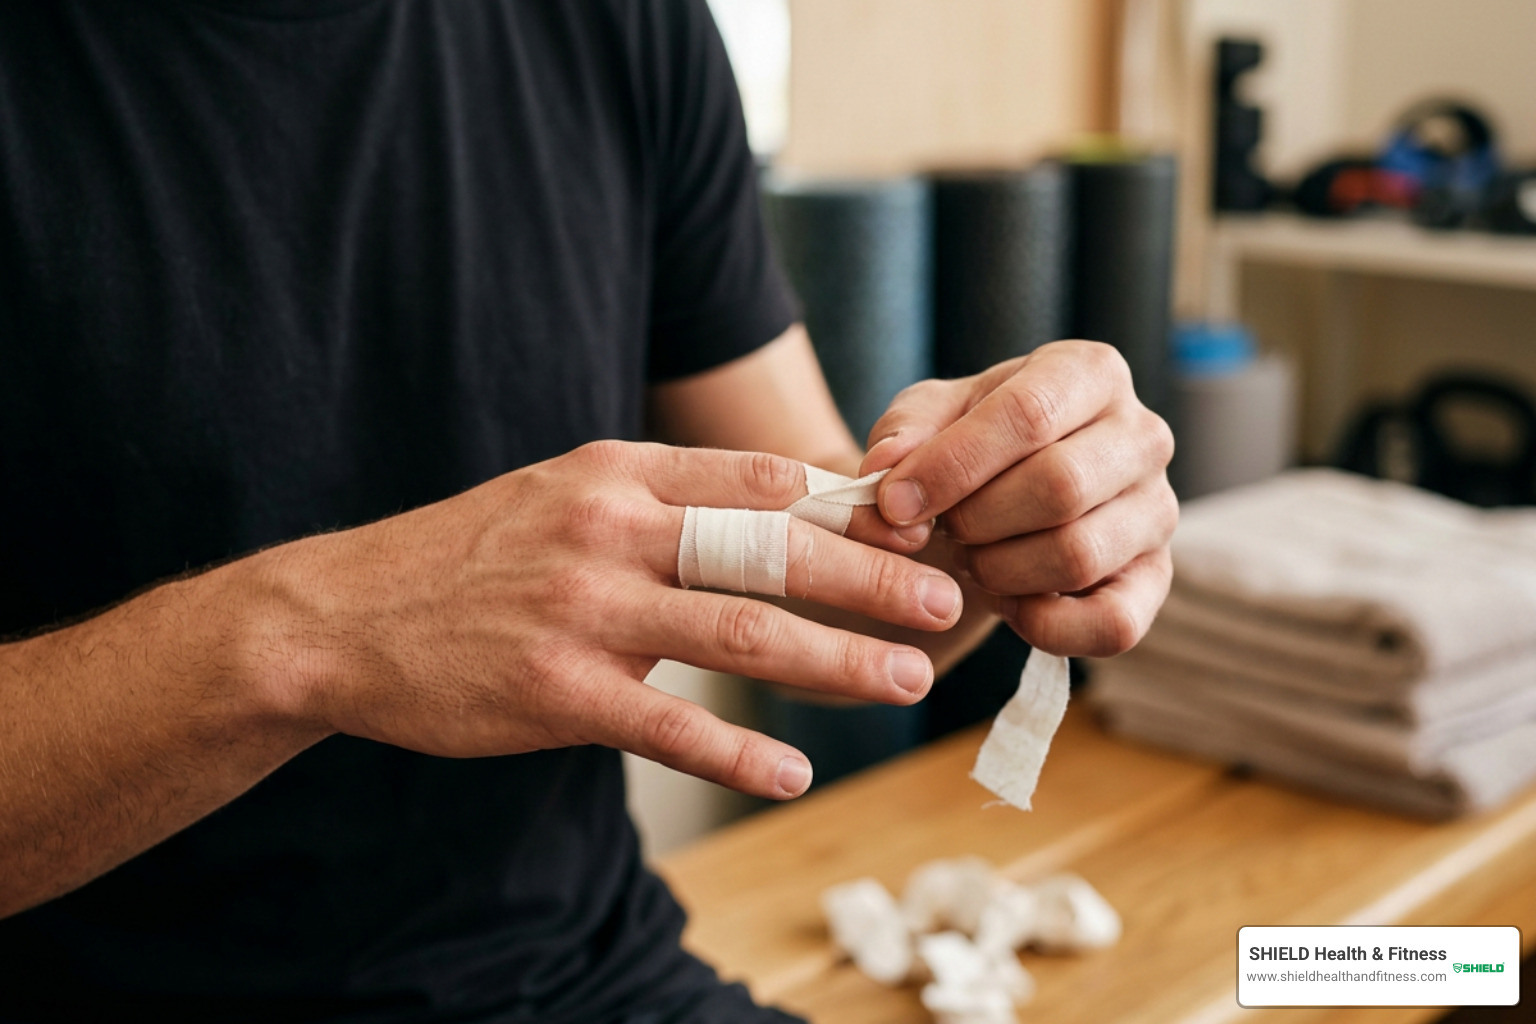
Review these physiotherapy protocols for finger strapping to ensure safe, effective use.
When to Avoid Taping and Medical Red Flags
Never use tape to cover up red-flag clinical conditions. Seek immediate medical evaluation if you encounter:
- Unstable or Displaced Fractures: A fractured bone requires rigid casting or surgical pinning; soft strapping will not maintain bone alignment. That full recovery from a finger fracture can take up to five months.
- Open Wounds and Skin Infections: Taping over active infections or raw wounds traps moisture and bacteria, increasing the risk of cellulitis.
- Extensor Tendon Ruptures: "Mallet finger" (inability to straighten the DIP joint) or "boutonnière deformity" requires specialized extension splints, not standard tape wraps.
- Impaired Circulation: If your finger shows pale or bluish discoloration, numbness, tingling, or throbbing, remove the wrap immediately. Check capillary refill by pressing the fingernail for three seconds; healthy pink color must return within two seconds.
Safe Tape Removal, Wear Limits, and Skin Health
Strapping should remain a temporary rehabilitative aid, not a permanent habit.

- 48-Hour Hard Limit: Never leave athletic tape on a digit for more than 48 hours continuously. For daily training, remove the tape immediately after your workout to allow the skin to breathe and recover.
- 6-8 Week Window: Use therapeutic strapping during the initial 6 to 8 weeks of tissue healing. Relying on tape beyond 8 weeks can delay natural ligament remodeling and create psychological dependence.
- Safe Removal: Do not rip tape off forcefully, which pulls away outer layers of skin. Use blunt-nosed bandage scissors to slide under the tape on the side of the finger, cut cleanly, and peel the tape back onto itself while supporting the underlying skin.
- Skin Recovery: Wash thoroughly after removal and apply a natural moisturizer to maintain the skin barrier and prevent friction tears.
Frequently Asked Questions About Finger Taping
Can finger taping prevent pulley ruptures in healthy climbers?
Prophylactic (preventative) taping on healthy, uninjured fingers does not prevent pulley ruptures. Because healthy pulleys rupture under dynamic loads exceeding 400N, standard circumferential tape does not add enough structural stiffness to stop an initial tear. Its primary value for healthy athletes is enhanced tactile feedback, skin protection against friction, and psychological confidence.
How long should finger tape stay on before replacement?
Athletic tape applied for workouts should be removed immediately following the session. In clinical settings where tape acts as a dynamic splint, replace the application every 24 to 48 hours to inspect the skin, wash the hands, and prevent moisture-induced skin maceration.
What is the difference between buddy taping and X-taping?
Buddy taping links two adjacent fingers together to share physical loads and eliminate sideways movement, making it ideal for severe collateral sprains and stable fractures. X-taping isolates a single joint using a criss-cross pattern, allowing active joint flexion while protecting against hyperextension and minor lateral stress.
Conclusion
Finger joints are small, complex hinges that handle tremendous mechanical force across sports. Whether you are recovering from a sprained ligament on the court, offloading a healing A2 pulley at the climbing gym, or protecting your skin under a heavy barbell, mastering proper finger taping techniques keeps you training safely without risking long-term joint health.
At SHIELD Health & Fitness, we build professional-grade, American-made athletic tapes designed to handle tough training sessions. Backed by more than 35 years of manufacturing expertise, our high-tensile tapes deliver reliable joint support without leaving gummy residues or tearing up your skin.
Ready to protect your hands and upgrade your athletic kit? Explore our volleyball protective tape solutions and gear up with professional tools built to keep you performing at your best.