

How to Tape a Sprained Finger for Volleyball Safely
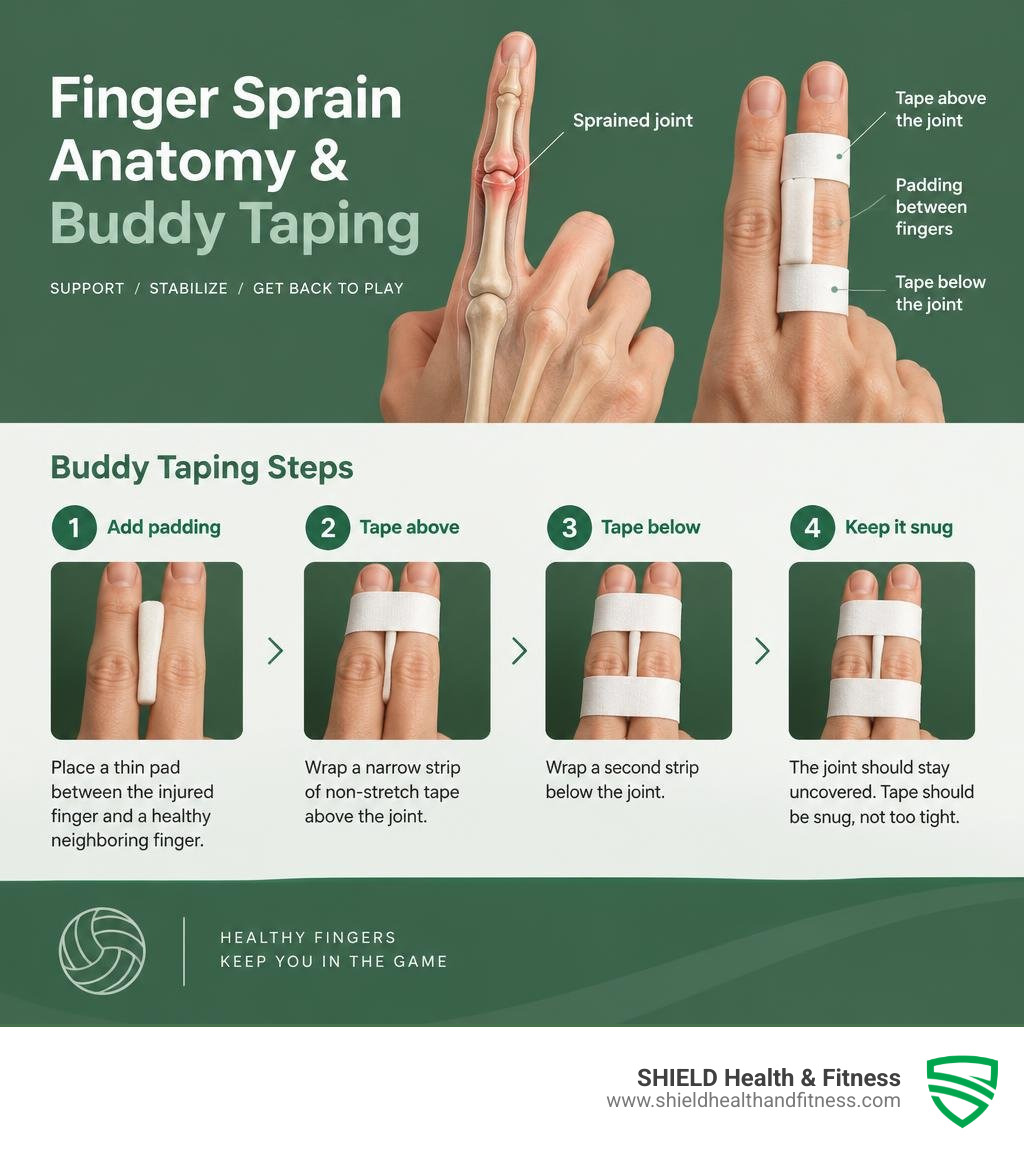
Knowing how to tape a sprained finger for volleyball starts with checking the injury. If the finger looks straight and you can bend and straighten it, place a thin pad between it and a healthy neighboring finger. Wrap two narrow strips of non-stretch athletic tape around both fingers, one above and one below the sore joint. Leave the joint uncovered, and keep the tape snug enough to support the finger without causing tingling or a color change.
Do not tape and return to play if the finger looks crooked, feels unstable or numb, has an open wound, or will not straighten. Get medical care instead. Even with tape, stop playing if catching, setting, or blocking hurts.
I'm Josh Key, and I've spent several years at SHIELD Health & Fitness supporting athletic product testing and demonstrations. I'll explain how to tape a sprained finger for volleyball, starting with how to tell whether taping is the right move.
Sideline Assessment: When to Tape vs. When to Seek Medical Attention
When a hard-driven spike clips the tip of your finger at the net, your natural instinct might be to reach into your gym bag, wrap a roll of tape around the digit, and jump straight back into the rotation. But taping is step three, not step one.
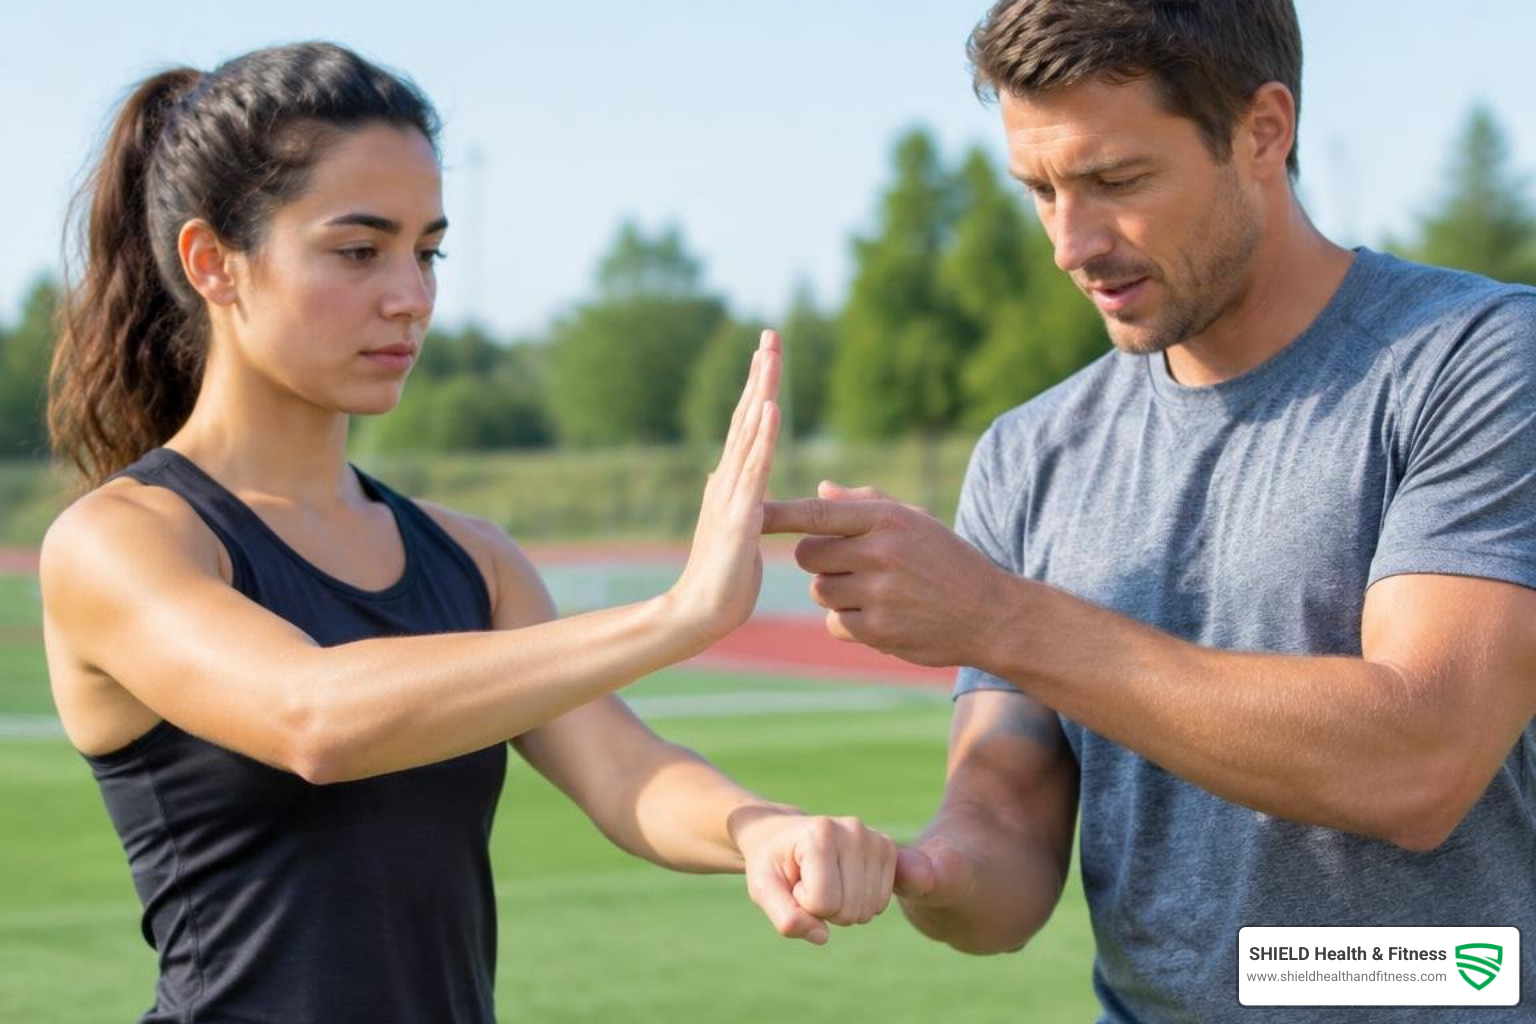
Before reaching for supplies, allow the hand to settle for a minute or two with the limb elevated. Then, conduct a structured sideline triage using the look, squeeze, and play assessment framework. Grounded in volleyball sideline triage protocols, this evaluation checks structural stability before you commit to supportive taping:
- Look: Inspect the injured hand alongside the uninjured hand. Are the joints aligned naturally? Can the athlete actively extend the finger without an unnatural lag or droop at the fingertip?
- Squeeze: Test grip strength and active stability. Ask the player to form a full fist and squeeze two of your fingers. Check for localized tenderness along the collateral ligaments (the bands running down the sides of the knuckles).
- Play: If the finger passes visual and strength checks, perform non-contact volleyball movements. Toss an overhead ball for a controlled set, followed by a forearm pass. If the athlete winces or alters their hand mechanics, they are not ready for court-side taping.
Pay special attention to youth players. Because children and adolescents have open growth plates (epiphyseal plates) near finger joints, an impact that causes a mild ligament stretch in an adult can cause a growth plate fracture in a younger athlete. When evaluating youth players, maintain a low threshold for benching the athlete and seeking an orthopedic consult.
Distinguishing Sprains, Dislocations, and Fractures
Understanding the severity of a finger injury ensures you apply tape only when it is clinically appropriate. Ligament injuries fall into three distinct classifications according to clinical finger sprain guidelines:
| Injury Type / Grade | Structural Damage | Key Symptoms | Taping Suitability |
|---|---|---|---|
| Grade 1 Sprain | Microscopic ligament stretching; no fiber rupture | Mild localized swelling; tenderness; full joint stability intact | Safe to Tape: Buddy taping provides lateral support for active play. |
| Grade 2 Sprain | Partial collateral ligament tear | Noticeable swelling; moderate pain; laxity with a distinct end point | Tape with Caution: Buddy tape for daily stability; hold from high-impact play until cleared. |
| Grade 3 Sprain | Complete ligament rupture or avulsion | Severe swelling; joint instability; no firm end point on stress test | Do Not Tape: Requires professional immobilization or surgical repair. |
| Joint Dislocation | Bones displaced from normal alignment at joint | Visible deformity; severe pain; inability to bend or straighten | Do Not Tape: Requires professional reduction and post-reduction X-rays. |
| Fracture / Mallet Finger | Bone fracture or extensor tendon avulsion | Bony step-off; bruising; unable to actively extend distal joint | Do Not Tape: Requires rigid aluminum splinting or casting. |
Sideline Red Flags Requiring Immediate Care
Do not attempt to buddy tape if any of the following red flags appear:
- Visible Deformity or Rotational Alignment Flaws: If the injured finger overlaps an adjacent finger when forming a partial fist, a fracture is likely.
- Mallet Finger: The tip of the finger rests in a bent position and cannot be actively straightened, signaling an extensor tendon rupture or avulsion fracture.
- Severe Neurovascular Changes: The finger turns pale, bluish, cold, or remains numb and tingling.
- Open Skin Wounds: Any compound fracture or open wound over a swollen joint presents an immediate risk of deep joint infection.
- Gross Joint Instability: The joint opens sideways without resistance when gently stressed.
How to Tape a Sprained Finger for Volleyball: Step-by-Step Instructions
Buddy taping works by splinting an injured finger to a strong, adjacent "buddy" digit. The healthy finger acts as a natural lateral stabilizer, preventing painful twisting and hyperextension while maintaining essential gripping and ball-handling mobility.
Preparation and Materials
To tape effectively, you will need:
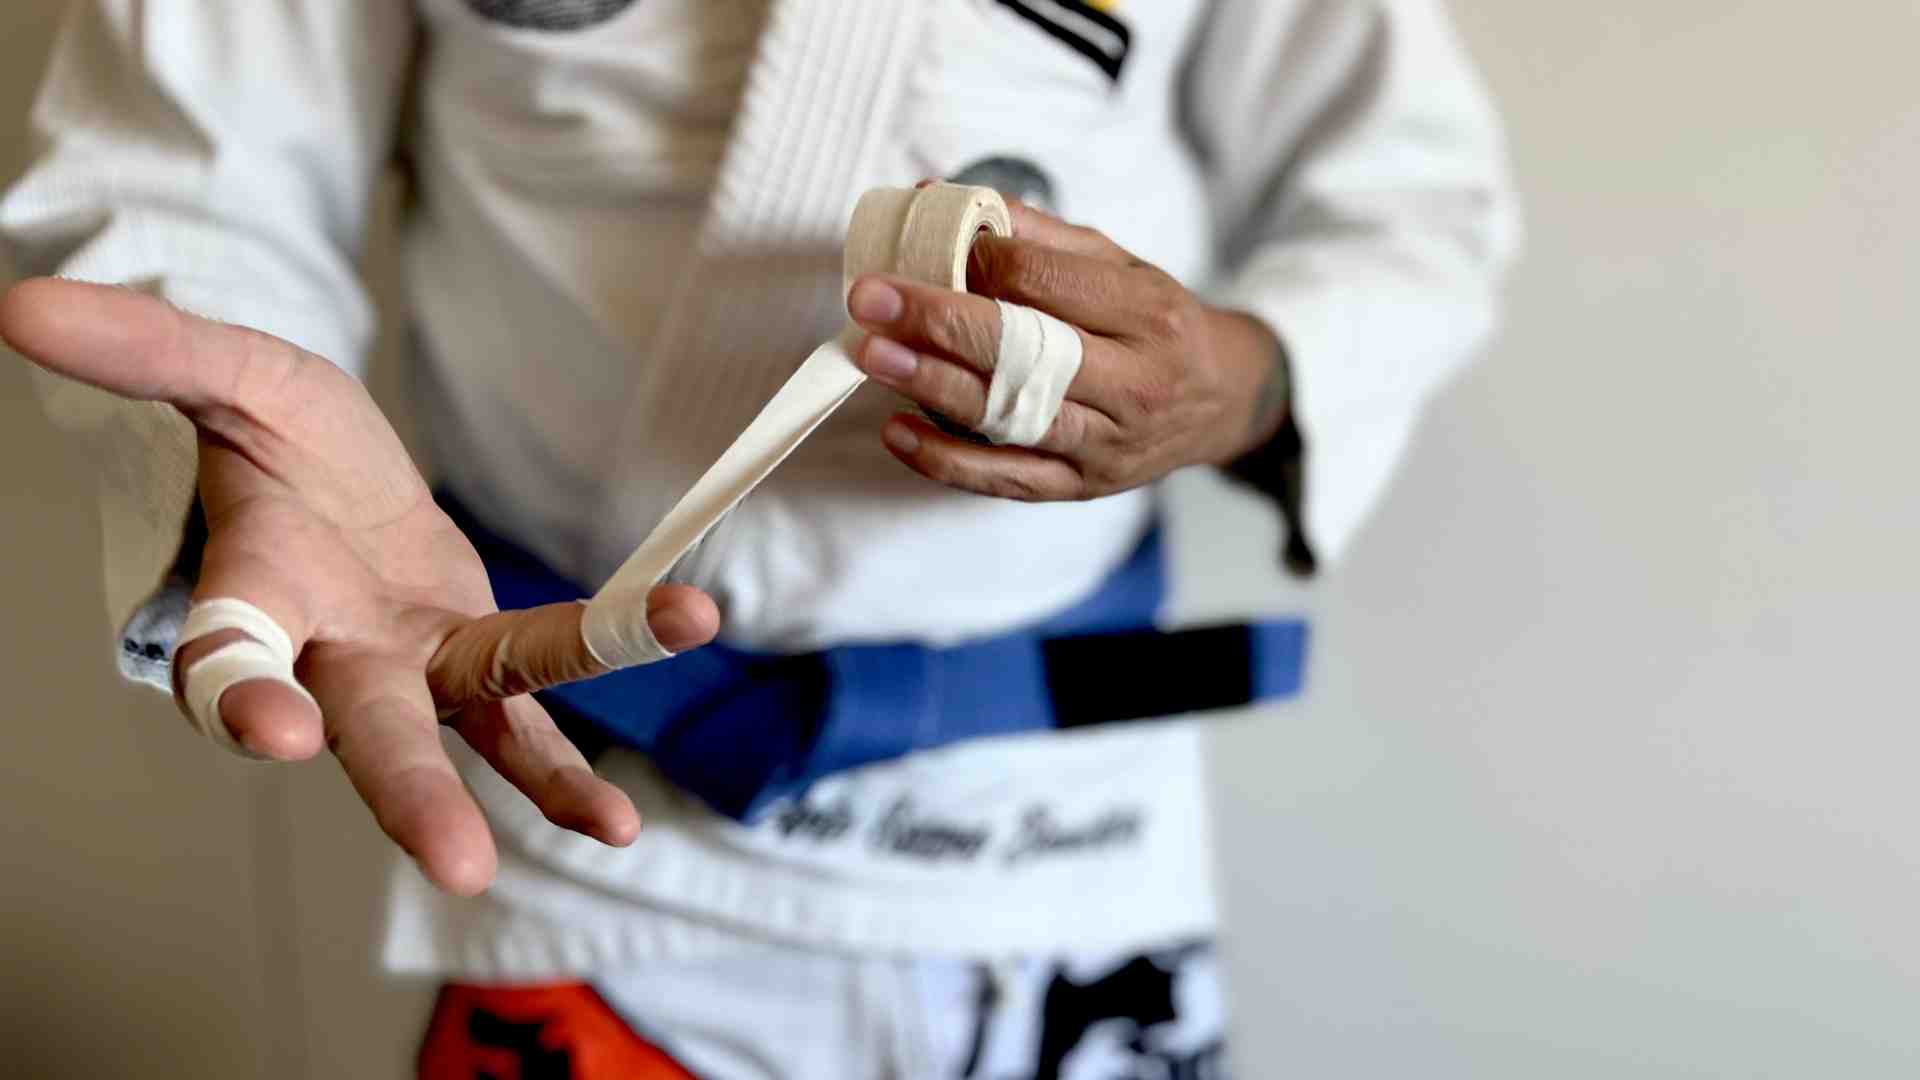
- Rigid Non-Stretch Zinc Oxide Sports Tape: Use a 2.5 cm (1-inch) wide roll of non-stretch tape, torn lengthwise into 1.25 cm (0.5-inch) strips. A standard ten-meter roll provides roughly fifty buddy tape applications, with each setup requiring about twenty centimeters of tape. Avoid elastic tapes for acute sprains, as stretchy fabrics yield under ball impact and fail to prevent hyperextension.
- Interdigital Foam or Cotton Gauze: A small strip of foam padding or folded sterile gauze placed between the digits prevents skin-on-skin friction, sweat accumulation, and skin breakdown (maceration).
- Blunt-Nosed Bandage Scissors: For clean, safe removal without snagging swollen skin.
Before applying tape, thoroughly wash and dry the hands. Sweat, court dust, and natural skin oils degrade adhesives quickly. We recommend utilizing dedicated athletic tape for hands designed to withstand high friction and moisture.
How to Tape a Sprained Finger for Volleyball Using the Buddy Tape Method
Follow these step-by-step instructions based on established support taping principles for finger sprains:
-
Select the Correct Buddy Finger:
- If the index finger is sprained, tape it to the middle finger.
- If the middle finger is sprained, pair it with the index finger (for setter control) or the ring finger (for blocking stability).
- If the ring finger is sprained, pair it with the pinkie finger to preserve natural palm mechanics.
- If the pinkie finger is sprained, pair it with the ring finger.
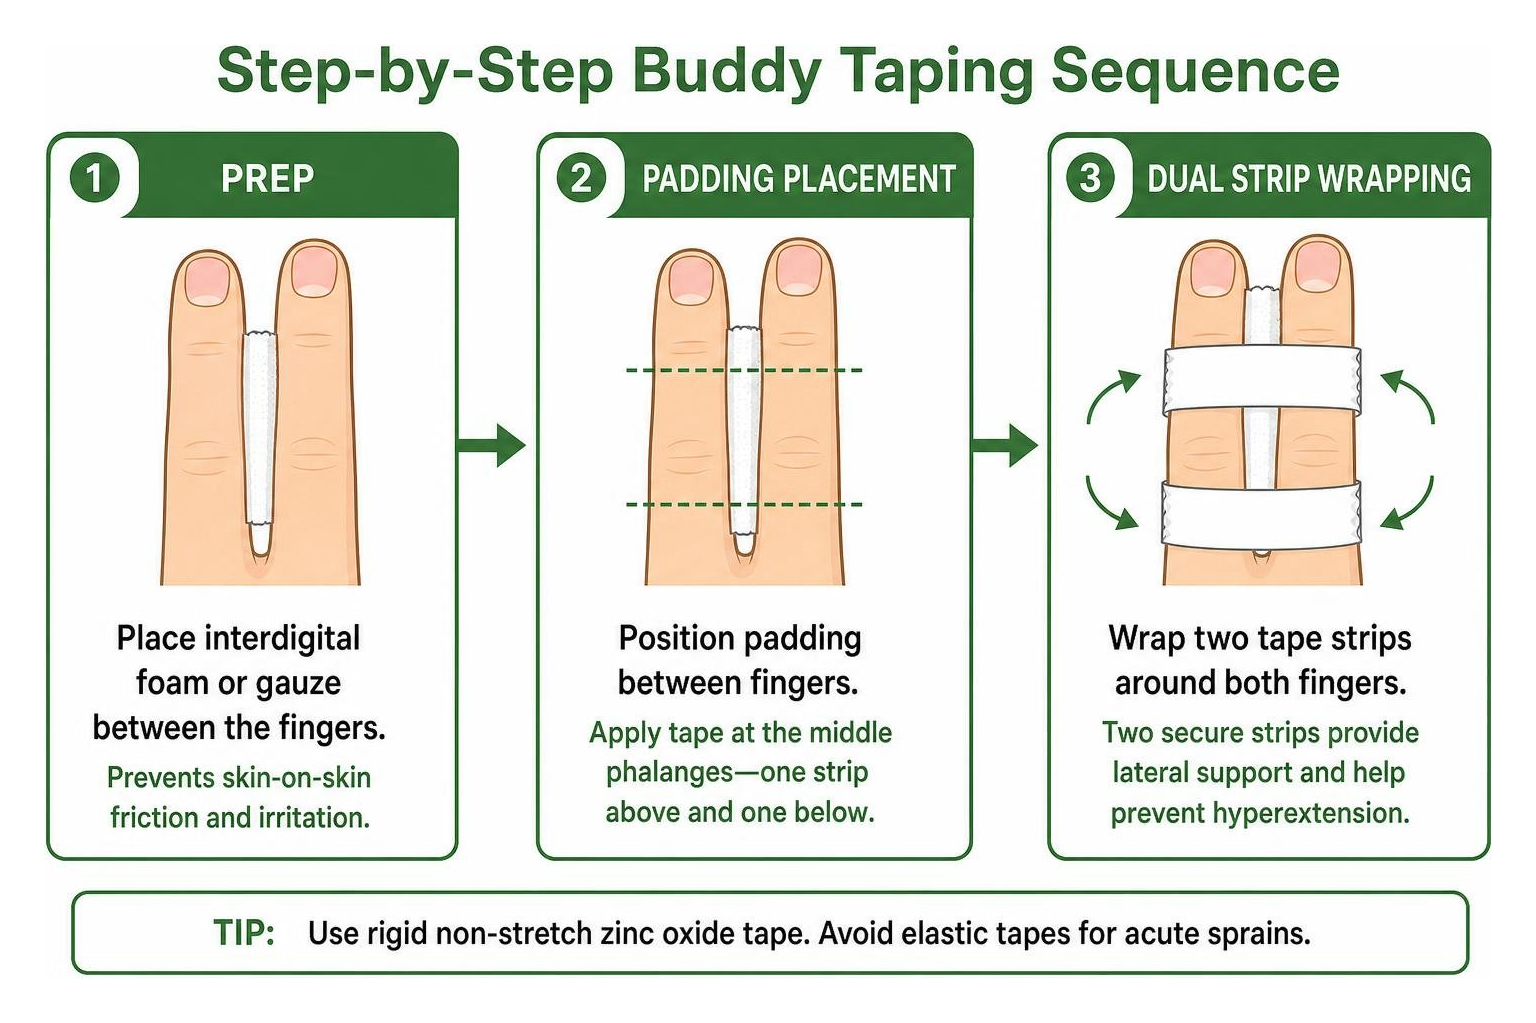
- Insert Interdigital Padding: Slide a small piece of folded cotton gauze or thin foam between the two fingers, covering the webbing and the sides of the proximal and intermediate phalanges.
- Apply the Lower Support Wrap (Proximal Phalanx): Take a 20 cm strip of 1.25 cm non-stretch tape. Anchor the tape between the knuckle (MCP joint) and the middle knuckle (PIP joint). Wrap the tape around both fingers twice in a smooth, firm motion. Do not pull so tightly that you compress the soft tissue.
- Apply the Upper Support Wrap (Intermediate Phalanx): Take a second 20 cm strip of 1.25 cm tape. Wrap it twice around both fingers between the middle joint (PIP joint) and the distal joint (DIP joint near the fingernail).
- Leave the Joint Lines Free: Ensure both the PIP and DIP knuckles remain fully uncovered. This allows the fingers to bend smoothly into a fist for passing and digging while stopping sideways torque.
Advanced Joint Stabilization: How to Tape a Sprained Finger for Volleyball Blockers and Setters
Depending on your position on the court, your fingers face different physical demands. Hitters and middle blockers absorb high-speed collisions at the net, making hyperextension their biggest risk. Setters, on the other hand, require fingertip touch, precision, and quick release.
Understanding why volleyball players tape their fingers helps you tailor your wrap to your position:
- For Blockers (Hyperextension X-Taping): Prior to buddy taping, place a small "X" pattern using narrow tape across the palmar surface (underside) of the sprained PIP joint. Anchor the ends of the "X" onto the bony phalanges above and below the knuckle. This creates a mechanical brake that stops the joint from bending backward when absorbing a heavy spike.
- For Setters (Dynamic Functional Taping): Setters need tactile feedback at their fingertips. Keep the DIP joint entirely free and use slightly narrower 1 cm tape strips. High-tack finger tape provides joint security without adding excess bulk that might alter touch on the ball.
Taping Thumb Sprains and Special Digit Pairings
A sprained thumb cannot be buddy-taped to the index finger. The thumb's wide range of motion, unique saddle joint (carpometacarpal joint), and broad web space make buddy taping ineffective and uncomfortable.
Thumb sprains in volleyball typically involve damage to the ulnar collateral ligament (UCL) at the base of the thumb (metacarpophalangeal joint), often caused when a ball forces the thumb backward and away from the palm. When dealing with thumb sprains, applying specialized athletic tape for injuries stabilizes the base of the hand without restricting your wrist snap.
Note: If you feel a palpable lump or experience severe weakness when pinching your thumb and index finger together, seek immediate medical evaluation to rule out a complete UCL tear or Stener lesion.
Proper Finger Pairing Strategies
When buddy taping the fingers, pairing the correct digits preserves natural hand mechanics:
- Index and Middle Fingers: These fingers share similar lengths and flexor tendon pathways, making them an ideal pair. This combination provides great stability for passing and setting.
- Ring and Pinkie Fingers: If either the fourth or fifth digit is sprained, buddy tape the ring finger to the pinkie finger. Angling the tape strips slightly accounts for the difference in finger length. Taping the ring finger to the middle finger can restrict the hand's grip, making the ring-and-pinkie pairing a better option for court play.
Step-by-Step Volleyball Thumb Spica Technique
To support a mild to moderate thumb sprain, use the thumb spica technique:
- Apply the Wrist Anchor: Wrap a 3.8 cm (1.5-inch) strip of rigid athletic tape loosely around the wrist, just below the hand. Keep the wrist in a neutral, relaxed position.
- Set the Functional Position: Hold the thumb in a relaxed, functional posture—as if holding a soda can.
- Apply the First Spica Strip: Using a 1.25 cm (0.5-inch) non-stretch tape strip, anchor on the back of the wrist tape. Bring the tape across the back of the hand, loop around the base of the thumb (through the web space), cross over the palm side of the MCP joint, and secure back onto the wrist anchor.
- Apply the Second Overlapping Strip: Repeat the figure-of-eight wrap with a second strip, overlapping the first by half its width to form a supportive herringbone pattern over the joint.
- Lock the Anchors: Seal the ends by applying a final single wrap of 3.8 cm tape around the wrist anchor.
Safe Return-to-Play, Recovery Timelines, and Skin Care
Once your finger is taped, managing the injury off the court is essential for long-term recovery. For the first 48 to 72 hours following an acute sprain, follow the P.R.I.C.E. protocol (Protection, Rest, Ice, Compression, and Elevation).
Instead of placing a traditional ice pack over the top of the hand, try cold-water immersion. Submerge the hand in a bowl of cold water with ice cubes for 15 to 20 minutes every 2 to 3 hours. This chills the entire joint evenly, helping control swelling without putting direct pressure on tender ligaments. For more detailed maintenance and preparation protocols, consult our volleyball athletic tape guide.
Checking Tape Tension and Circulation
Applying tape too tightly can restrict blood flow and lead to tissue damage. Always run these two circulation checks immediately after taping and again after your warm-up:
- The Capillary Refill Test: Firmly press the fingernail of the taped finger until the nail bed blanches white, then let go. Natural pink color should return in under two seconds. If the nail bed stays white, pale, or turns purple, the tape is too tight and must be replaced.
- The Warm-Up Swell Check: Physical exercise increases blood flow and causes hands to swell slightly. Tape that felt comfortable in the locker room can quickly become constrictive on the court. If you experience throbbing, tingling, or cool fingertips during play, remove and reapply the tape right away.
Daily Hygiene and Skin Protection
Leaving athletic tape on for days at a time can trap moisture and sweat, leading to skin irritation and bacterial growth.
- Remove Tape After Every Session: Always remove buddy tape immediately following practices and games. Never sleep with sports tape on your fingers.
- Use Safe Removal Tools: Cut tape away using blunt-nosed bandage scissors along the side of the finger, avoiding direct contact with swollen knuckles.
- Wash and Air the Skin: Wash your hands thoroughly with soap and water to remove sweat and adhesive residue, then let the skin air dry completely.
Expected Recovery Timelines and Weaning Off Tape
Ligament tissue takes time to rebuild structural integrity:
- Grade 1 Sprains: Typically begin feeling better within 3 to 5 days, with full recovery taking 2 to 4 weeks.
- Grade 2 Sprains: Often require 2 to 4 weeks of buddy taping during activity, with full ligament recovery taking up to 3 to 5 months.
- Grade 3 Sprains: Can take several months to heal and often require structured physical therapy or surgical intervention.
Once normal grip strength returns and the joint is pain-free under stress, begin weaning off the tape during light drills. A sprained finger joint can remain thicker than its neighbor for months after an injury. Joint thickening alone is not a reason to keep taping once strength, range of motion, and stability have fully recovered.
If multiple players on a team experience recurring finger sprains, look closely at hand mechanics. Frequent sprains during blocking or setting often point to technical habits—such as soft blocking hands or improper finger positioning—rather than bad luck.
Frequently Asked Questions About Volleyball Finger Taping
How can I tell if my finger tape is applied too tightly during a match?
You can tell your tape is too tight if you notice throbbing, tingling, numbness, cool skin, or a bluish tint in the fingertip. You can also use the capillary refill test: press the fingernail until it turns white. If the pink color takes longer than two seconds to return, the wrap is restricting blood flow. Remove the tape, let circulation normalize, and reapply with lighter tension.
What taping methods are allowed during volleyball games?
Most volleyball associations and federations allow soft athletic tape and buddy taping on the fingers, provided there are no hard, rigid, or metallic components. Hard plastic splints, metal finger braces, and jewelry are strictly prohibited during competition for player safety. Always check your specific league regulations prior to match day.
How long should I continue buddy taping my finger after a sprain?
For mild Grade 1 sprains, buddy taping is generally used during sports for 1 to 2 weeks. Moderate Grade 2 sprains may require taping during practices and matches for 2 to 4 weeks. Use tape only during active play rather than all day, and phase it out as your grip strength and joint stability return. If pain and instability persist after a week of rest, seek a professional medical evaluation.
Conclusion
A jammed or sprained finger does not have to keep you off the court, but playing through unmanaged pain can turn a minor stretch into a chronic ligament tear. By taking a few moments to assess the joint on the sideline, using rigid non-stretch tape correctly, and keeping the knuckles free to bend, you can protect your hands and stay confident at the net.
At SHIELD Health & Fitness, we manufacture professional-quality athletic tapes built to hold up through intense rallies and sweaty match conditions. With over 35 years of American-made manufacturing expertise, our products are trusted by athletes and trainers for reliable joint stability. To keep your gym bag stocked for game day, explore professional-grade volleyball athletic tape and step onto the court ready to play.