
How to Tape Fingers for Volleyball Before You Play
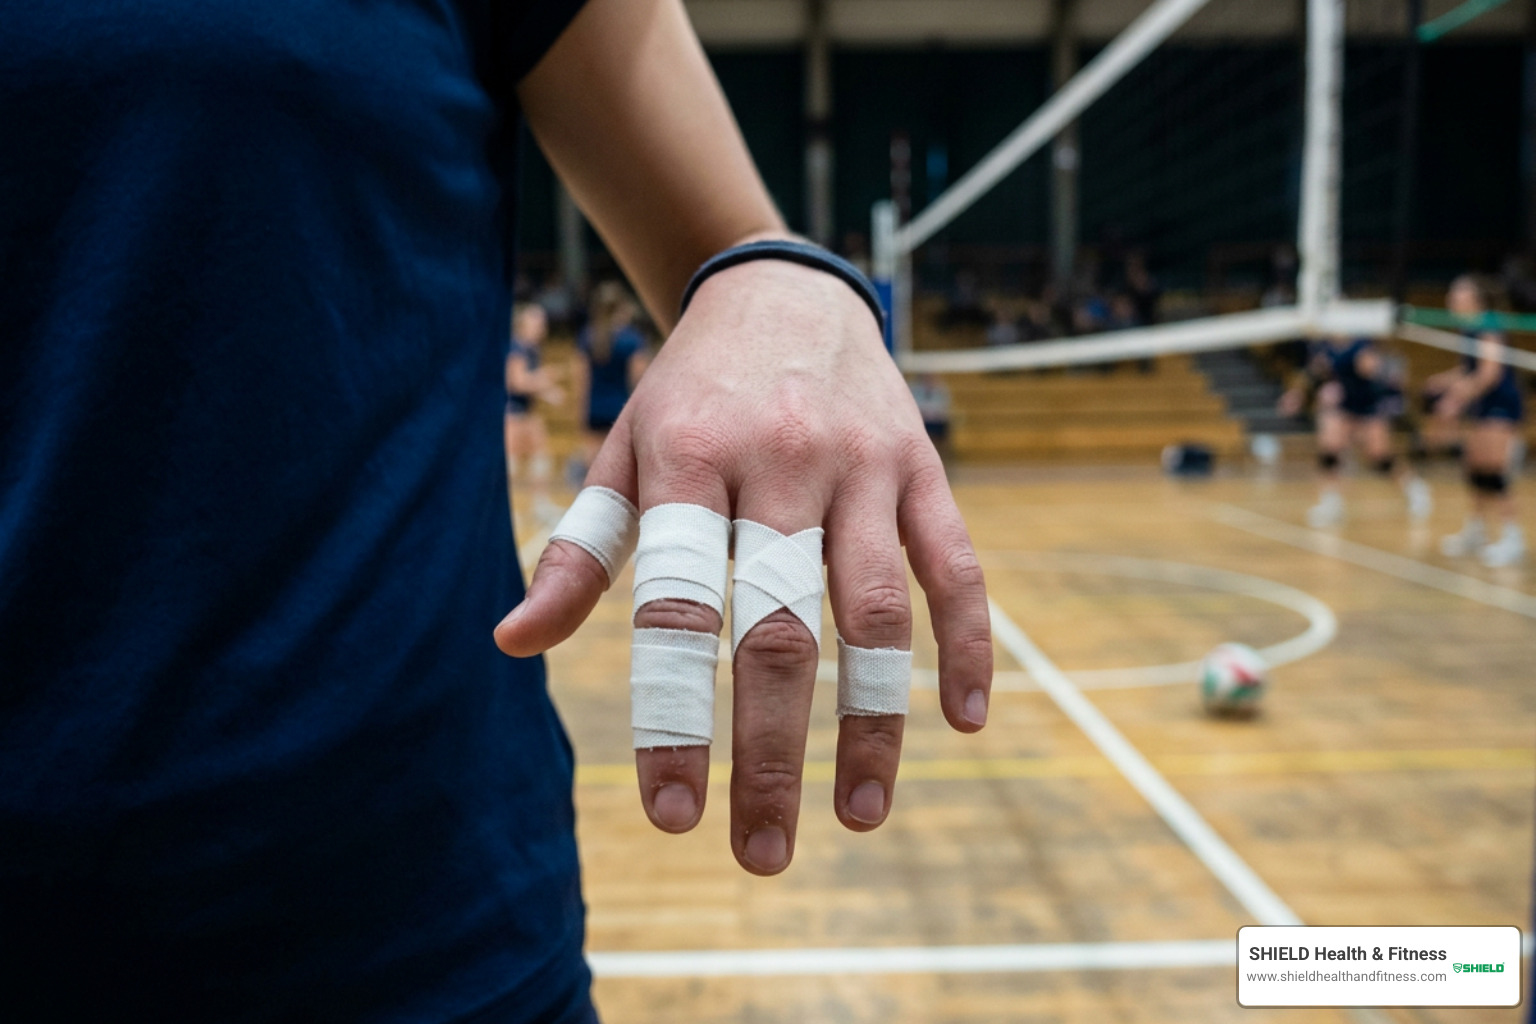
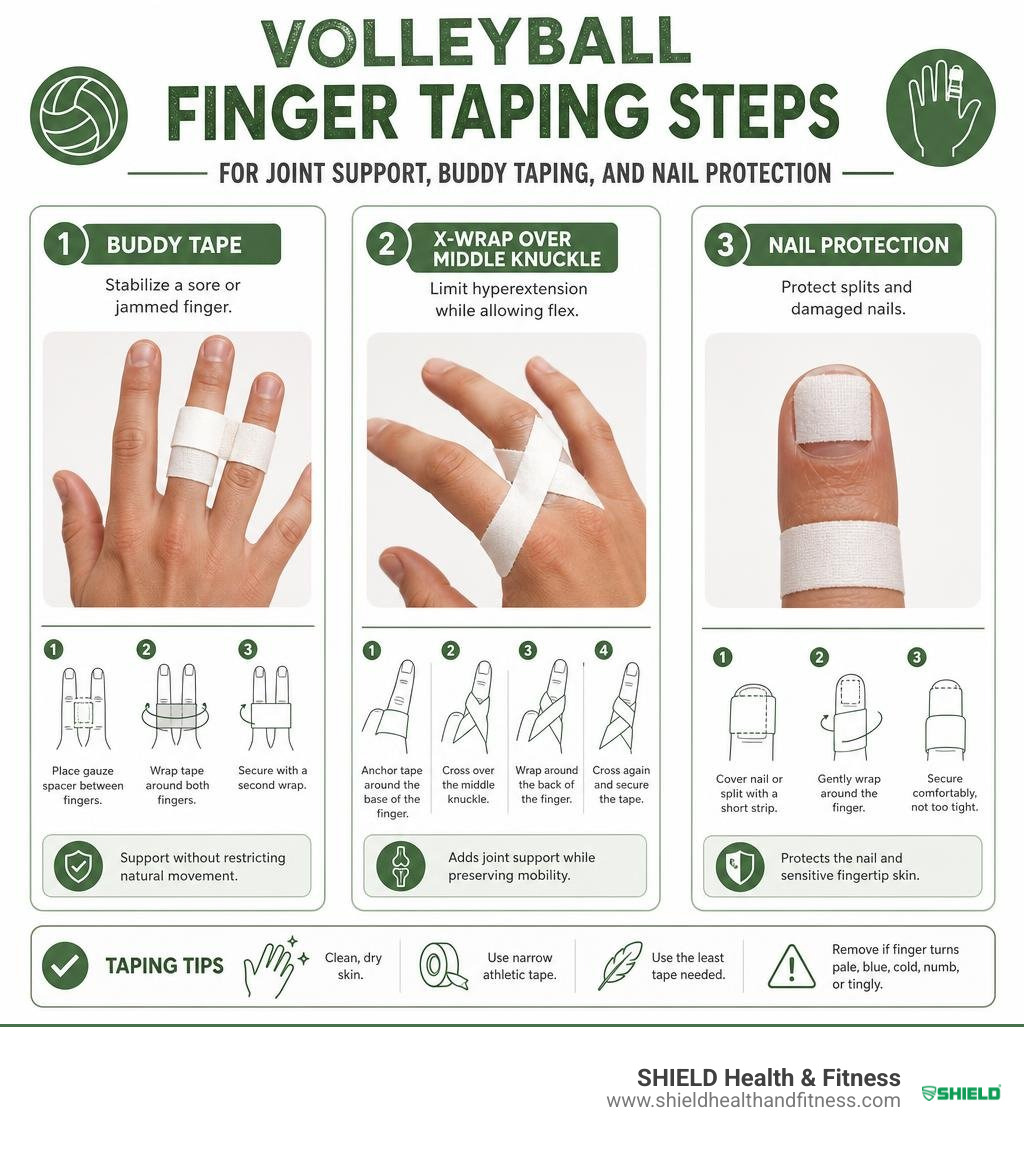
For taping fingers for volleyball, start with clean, dry skin and use narrow athletic tape. Apply the least tape needed for your goal:
- Buddy tape a sore or jammed finger to the finger beside it, with a small gauze spacer between them.
- Use a light X-wrap over the middle knuckle when you need to limit hyperextension but still want some bend.
- Cover a split fingertip or damaged nail with a short strip, then secure it with one gentle wrap.
The tape should feel supportive, not restrictive. If your finger turns pale, blue, cold, numb, or tingly, remove it and reapply with less tension.
Finger protection matters in volleyball. Fingers account for a large share of upper-extremity volleyball injuries, especially sprains, strains, and fractures from blocking, setting, and fast ball contact. Proper tape can add light joint support, protect vulnerable skin and nails, and help you play with more confidence. It is not a substitute for an exam when a finger is crooked, severely swollen, or hard to move.
I am Josh Key of SHIELD Health & Fitness. My work in performance and recovery product testing has shown me that taping fingers for volleyball works best when the tape, tension, and technique match the athlete's actual need.
Why Taping Fingers for Volleyball Is Essential for Court Performance
Volleyball demands high-velocity collisions between bare hands and an incoming leather ball moving at speeds well over 60 miles per hour. Whether meeting an attacker's hit at the tape or absorbing a heavy float serve, your digits endure violent force. Gaining a solid foundation in understanding finger anatomy and biomechanical strain helps you recognize how repetitive impacts compromise small joints, ligaments, and tendons.
A finger contains no large stabilizing muscle bellies. Stability relies almost entirely on the joint capsule, volar plate, and collateral ligaments. When an errant spike strikes the tip of an extended finger, that force travels directly down the bone axis, risking acute trauma such as sprains, capsule tears, and microfractures. Medical specialists providing clinical insights on hand and finger trauma highlight that sports taping acts as an external reinforcement layer, dispersing blunt impact across a broader surface area and limiting painful hyperextension.
Clinical Evidence and Biomechanical Joint Support
Epidemiological studies confirm the heavy toll volleyball takes on hands. Upper body injuries to the wrist, hand, and shoulder account for 20% to 30% of all volleyball injuries. Digging deeper into hand trauma reveals startling figures:
- Finger injuries make up roughly 13.4% of all acute volleyball injuries, ranking third behind ankles (31.9%) and knees (17.4%).
- A remarkable 43% of upper-extremity volleyball injuries specifically involve the fingers.
- In youth players aged 18 and under, 43% of upper-limb injuries target the fingers—with 42.6% classified as sprains or strains and 19.5% as acute fractures.
- Over 57% of all volleyball-related fractures occur in the finger bones (phalanges).
From a biomechanical standpoint, the proximal interphalangeal (PIP) joint and distal interphalangeal (DIP) joint are the most vulnerable to lateral displacement and backward bending. When applying athletic tape, we introduce mechanical splinting that supports the collateral ligaments against sudden shear forces.
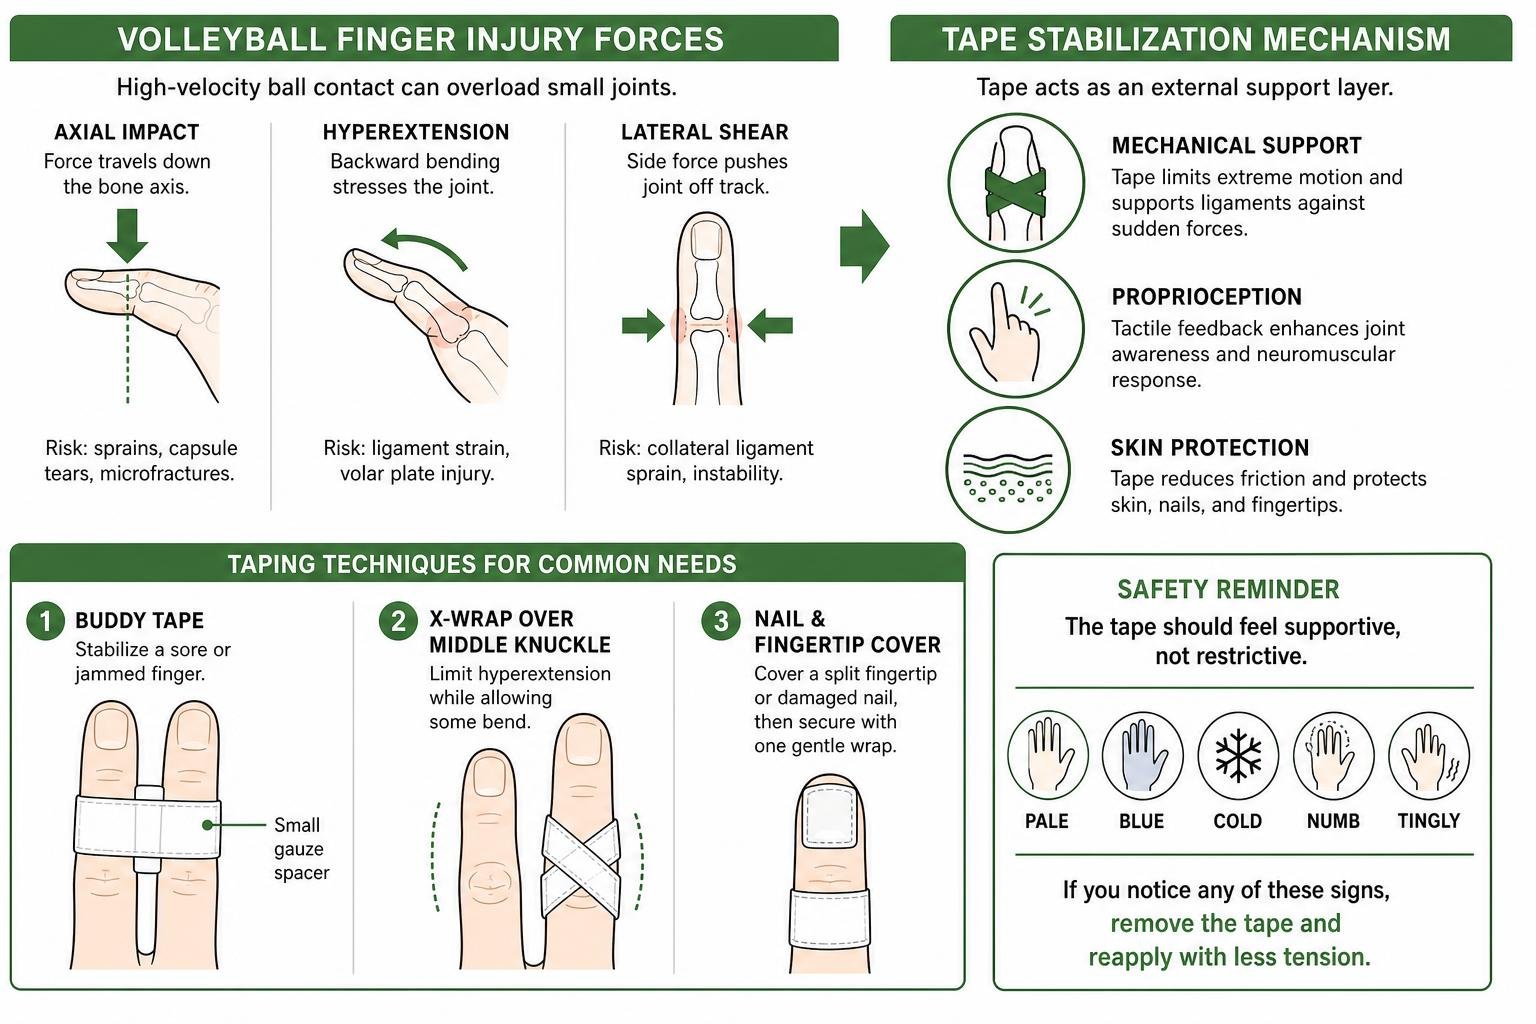
In addition to physical support, research detailing biomechanical analysis of volleyball finger stress demonstrates a vital secondary effect: neural proprioception. While the rigid mechanical restraint of tape slightly loosens during match play, the tactile feedback against the skin remains constant. This skin tension heightens sensory receptors, improving joint awareness and triggering faster neuromuscular responses when positioning the hands for a block or set.
Grip Enhancement and Skin Protection
Beyond structural joint protection, athletic tape solves severe dermatological issues common in court and beach volleyball. Repetitive friction from ball handling causes cracked cuticles, painful calluses, split fingertips, and blisters. Dry indoor gym air exacerbates skin fissures, turning routine contacts into painful events.
Applying tape provides essential skin shielding and moisture management. It absorbs friction, prevents deep skin cracking around the nail folds, and offers uniform ball traction. Using essential finger tape techniques maintains hand comfort so players can handle hard passes without hesitation.
Step-by-Step Techniques for Taping Volleyball Fingers
Proper application dictates whether tape enhances court performance or becomes an annoying distraction. Follow these preparation steps before applying your wraps:
- Clean Hands Thoroughly: Wash with warm water and soap to eliminate natural body oils, sweat, and floor dust.
- Dry Completely: Moisture ruins adhesive backing. Ensure skin between the fingers is bone dry.
- Avoid Lotions: Do not apply hand moisturizers or balms prior to court sessions.
- Inspect Nails: Trim ragged edges to avoid catching them underneath the tape wraps.
- Prep Tape Strips: Pre-tear or cut tape to designated lengths using clean edges rather than stretching it off the roll.
Mastering athletic tape for hands ensures your tape stays intact through long sets and dives.
Buddy Taping Method for Joint Stability and Jammed Fingers
Buddy taping binds an injured or vulnerable finger to an adjacent healthy digit. The healthy finger acts as a natural splint, maintaining alignment while preventing lateral twisting.
Best pairings: Index with middle finger (for setting control), or ring finger with pinky (for blocking reinforcement).
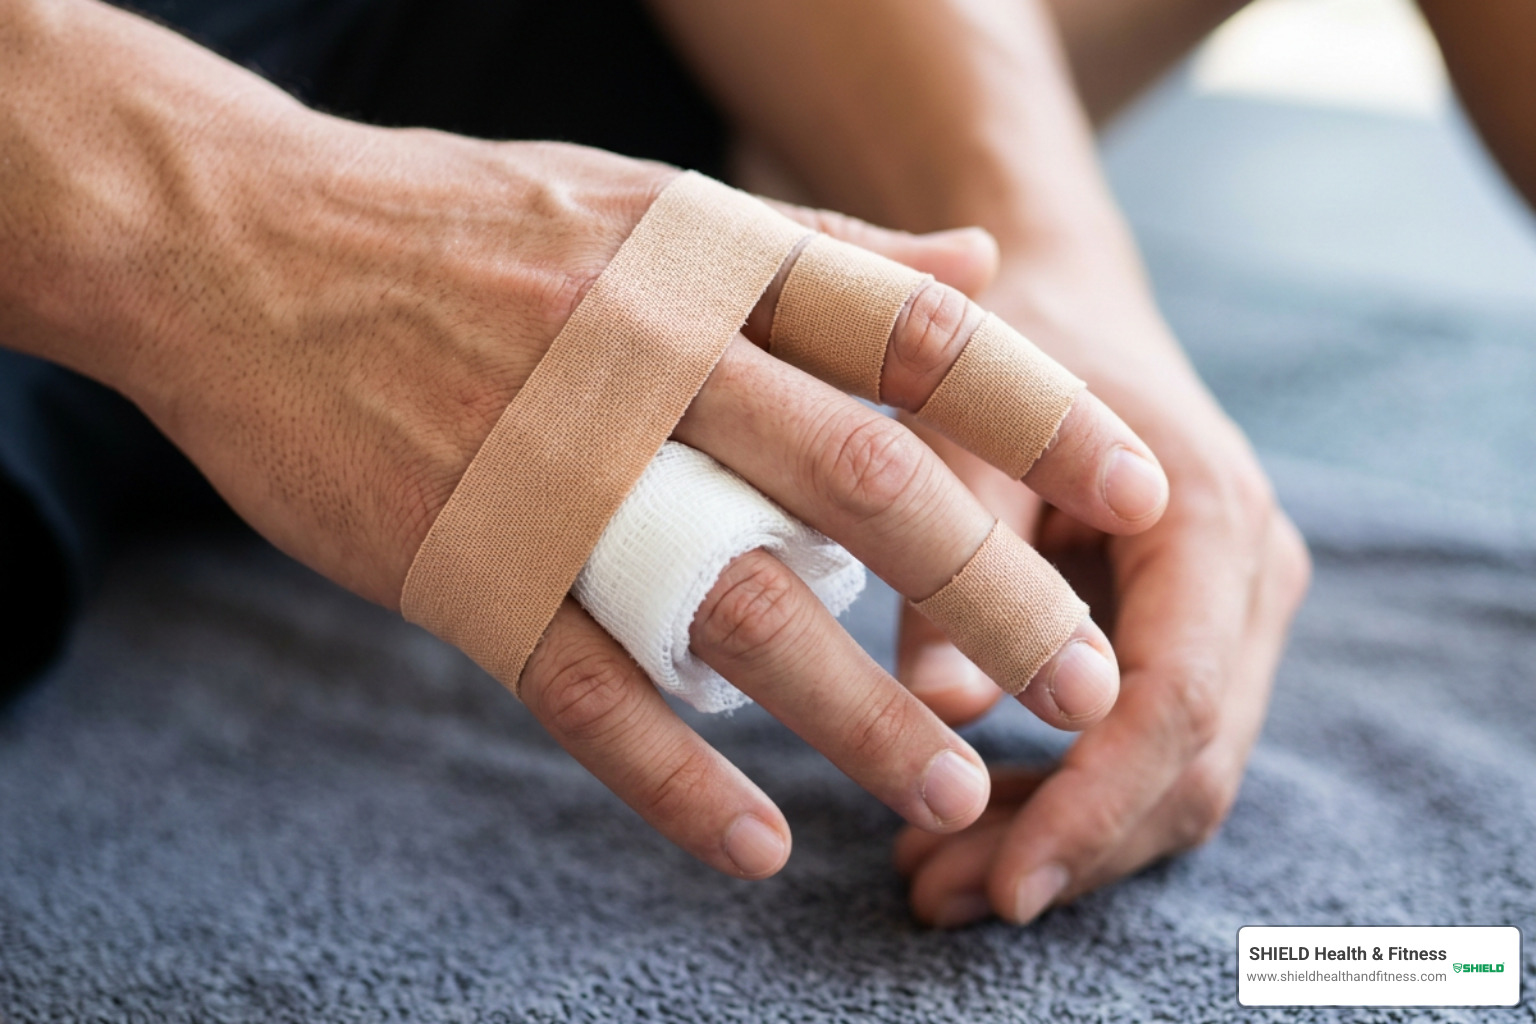
- Insert a Spacer: Place a small piece of folded medical gauze between the two fingers to avoid moisture buildup, skin softening, and blister friction.
- Anchor the Base: Position a 0.5-inch strip of rigid athletic tape around the base of both fingers (between the knuckle and the PIP joint). Wrap twice around, applying light, consistent tension.
- Clear the Knuckles: Leave the middle joint (PIP) exposed so both fingers can still bend naturally into a fist.
- Anchor the Upper Phalanx: Place a second strip between the PIP joint and the DIP joint. Wrap twice around and smooth down the end on the top side of the finger.
- Check Mobility: Ensure the fingertips flex together smoothly without pulling or pinching the skin.
Criss-Cross X-Wrap to Prevent Finger Hyperextension
When you need isolated joint stability without binding two fingers together, the criss-cross X-wrap stabilizes the PIP joint against violent backward bending while preserving forward flexion.
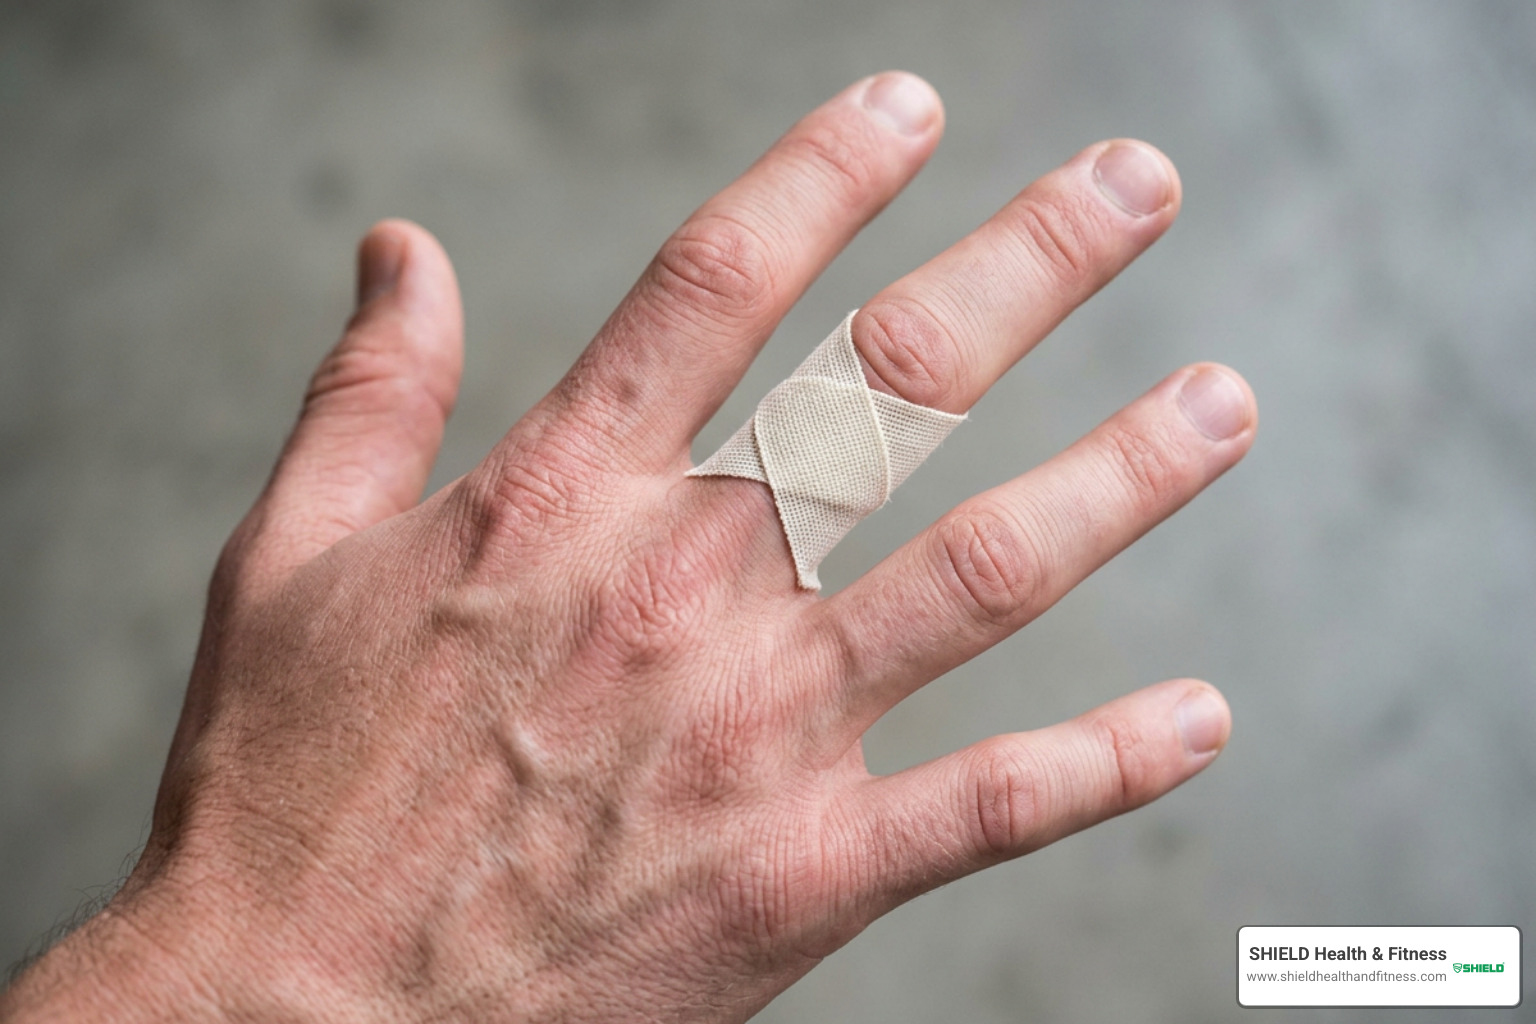
- Apply Lower Anchor: Wrap a single anchor strip around the phalanx just below the PIP joint.
- Build the First Diagonal: Anchor a narrow tape strip on the lower back of the finger, draw it diagonally across the front palmar crease of the joint, and secure it on the opposite upper side.
- Form the X: Repeat the motion in reverse from the opposite side, crossing the palmar crease to complete an "X" pattern directly over the soft, vulnerable front of the joint.
- Apply Upper Anchor: Place an anchor wrap above the PIP joint, securing the loose ends of the X-strips.
- Seal the Wrap: Smooth down all edges. The tension on the palmar side will physically catch and arrest the joint before it hyperextends.
Fingertip and Nail Taping to Prevent Splits and Impact Tears
Blockers and frequent attackers regularly split their nail beds or tear cuticles from hard deflections. This capping technique seals the fingertip against trauma.
- Position the Cap Strip: Take a 3-inch long piece of narrow tape. Place one end on the fingerprint pad, draw it smoothly up over the fingertip and down across the nail plate.
- Secure the Perimeter: Take a second strip and wrap it horizontally around the top phalanx, locking the longitudinal cap firmly in place.
- Trim Excess: Ensure no adhesive overlaps into the DIP joint crease, keeping fingertip sensation crisp.
Choosing the Right Tape and Position-Specific Applications
Every position on the court presents unique physical demands on the hands. Selecting the appropriate tape material is just as critical as your taping method.
| Tape Type | Elasticity / Stretch | Adhesive Grip | Primary Court Benefit | Best For |
|---|---|---|---|---|
| Rigid Zinc Oxide Tape | Zero Stretch | Maximum / High Shear | Immobilization & hyperextension lock | Blockers, Middle Hitters, Jammed digits |
| Elastic Stretch Tape | Moderate (20-40%) | Medium / Flexible | Joint tracking with active range of motion | Setters, Outside Hitters |
| Rayon Fabric Tape | Minimal Stretch | Ultra-High Tensile | Extreme friction resistance, sweat-proof | Heavy Hitters, Multi-match tournaments |
| Cohesive Self-Stick Wrap | High Elasticity | Sticks to itself, not skin | Quick field wrap, sensitive skin | Rapid sideline support, Practice days |
Position-Specific Strategies for Taping Fingers for Volleyball
- Setters: Touch and micro-adjustments dictate setting consistency. Setters should avoid bulky wraps. Opt for thin strips of stretch tape using the X-wrap on thumb and index joints, keeping pads exposed to maintain precise ball feel.
- Outside & Middle Hitters: High-speed attacks generate massive torque. Hitters benefit from reinforced nail capping and criss-cross wraps on their dominant hand's middle and index fingers to absorb blunt ball impact.
- Middle Blockers: Facing point-blank spikes makes blockers prime candidates for buddy taping the ring and pinky fingers. Utilizing high-tensile rigid tapes provides maximum structural defense against backward bending at the net.
- Liberos and Defensive Specialists: Repeated contact with hard court surfaces can cause turf burns and torn cuticles. Liberos benefit from light fingertip capping and elastic wraps that do not restrict reactive digging. Reviewing our ultimate athletic tape guide for volleyball provides comprehensive position setups.
Rigid Versus Elastic Tapes for Court Demands
For maximum immobilization, cotton or rayon rigid tapes utilizing medical-grade zinc oxide adhesives offer an unyielding physical barrier. Rayon tapes, such as Shield Rayon Finger Tape, deliver exceptional tensile strength that resists moisture and sweat without slipping.
Conversely, elastic stretch tapes permit normal joint articulation while maintaining joint compression and proprioceptive awareness. Balancing these tapes across our dedicated tape for volleyball line ensures hands stay fully protected without compromising quick ball release.
Best Practices, Mistakes, and Rules for Court Safety
Taping is an athletic tool, not an armor suit. Using proper habits keeps your hands healthy throughout long seasons.
Common Mistakes to Avoid When Taping Fingers for Volleyball
- Excessive Tension (Tourniquet Effect): Pulling tape too tightly restricts blood flow, causing numbness and loss of touch. Always lay tape smoothly on the skin rather than stretching it tightly around the circumference.
- Locking Every Joint: Wrapping across the PIP joint without an open hinge creates a rigid stick, hindering passing and setting control.
- Applying Over Dirt or Sweat: Adhesive will slip within three rallies if skin is not prepped clean.
- Tape Re-use: Never attempt to rewind and reuse soiled, stretched tape from a previous set.
- Over-Dependency and Neglecting Rehab: Tape supports injured joints, but relying on it indefinitely without performing grip and finger strengthening exercises can lead to ligament deconditioning.
Legal Regulations and Tournament Guidelines
Under standard USA Volleyball (USAV) and International Volleyball Federation (FIVB) guidelines:
- Soft athletic tape and finger wraps are completely legal across all competitive levels.
- Hard splints, metal braces, or plastic finger supports are strictly prohibited unless fully padded with soft, closed-cell foam and approved by the head official during pre-match inspections.
- Tape should ideally match team uniform colors or remain neutral (white, tan, or black) to avoid visual disruption for opponents and referees.
Frequently Asked Questions About Volleyball Finger Taping
How tight should finger tape be applied during matches?
Tape should fit snugly against the skin without applying compressive constriction. Check your circulation using a capillary refill test: press firmly on the exposed fingertip until it turns white, then release. Natural pink color should return in under two seconds. If the finger throbs, turns pale, feels cold, or tingles, immediately remove the wrap and re-tape with lower tension.
Which fingers are most commonly injured and taped in volleyball?
The pinky and ring fingers suffer the highest rates of dislocations and collateral ligament sprains, predominantly from blockers catching stray balls on the edge of the hands. The thumb and index finger experience frequent hyperextension during setting and attacking contacts.
Does taping fingers actually prevent volleyball injuries?
Yes. Clinical studies and kinematic reviews demonstrate that rigid and semi-elastic taping reduces ligament displacement under sudden impact. Although tape naturally stretches slightly during match play, its mechanical barrier curbs extreme hyperextension while enhanced proprioception helps players adjust hand position before injury occurs.
Conclusion
Protecting your hands is essential for playing confident, aggressive volleyball. Understanding how to apply clean buddy wraps, hyperextension X-patterns, and protective fingertip caps lets you step up to the net without worrying about sprains or splits.
At SHIELD Health & Fitness, we draw on over 35 years of American-made manufacturing expertise to produce professional-grade athletic tapes trusted by elite players and collegiate programs across the USA. Explore our full collection of court-tested athletic wraps at the SHIELD Health & Fitness Volleyball Store and check out our blog for more expert athletic tutorials. Keep your fingers protected, stay aggressive at the net, and play every set with confidence.